|
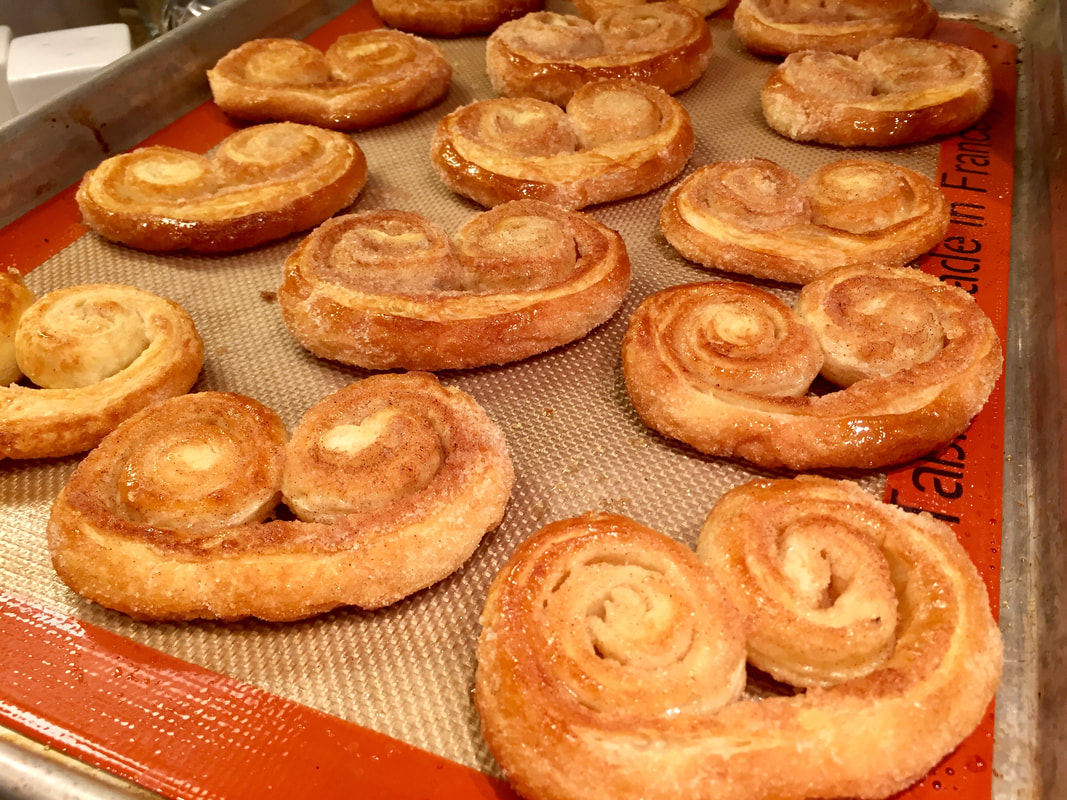
Easy French Cinnamon Palmiers your 5 year old child can make with little assistance. My inner child loves these cookies as much as your child will. Explore in your own home kitchen with baking homemade treats that will keep your kids entertained for an hour or so! Warning, you may need to equip them with a broom and dust pan, but don't worry clean up is quick.
This will also help keep the little ones occupied before and after lunch or dinner with a game or movie so you parents can get some weekly SIP work done. These Palmiers aren't limited to the little ones, I guarantee kids of all ages and adults will love these tasty light crunchy treats. Word is that there's a heat wave coming our direction, try to stay cool over the next week or so. If you're lucky enough to have a pool in your yard, Palmiers are also great poolside treats. AND, I must admit I'm so envious of those of you who have pools in your backyard! There's no better way to beat the heat. These delicious cookies also go well along side a scoop of your favorite sorbet or classic vanilla ice cream topped with cocoa nibs. Enjoy! Stay safe & healthy! (see recipe below) Easy Mini Cinnamon Palmiers Cookies These French cookies are also known as elephant ears. They are light, flaky, butter cookies that are perfect to enjoy as a treat or dessert with friends and family. Yields approximately 12-14 cookies Ingredients: 1 sheet puff pastry, thawed in refrigerator, sold in a box of 2 sheets, we recommend Pepperidge Farms or Trader Joe's puff pastry. 1 tablespoon unsalted butter, melted 2/3 cup granulated sugar 1 teaspoon good ground cinnamon A pinch fine sea salt, regular salt is okay Preparation: Preheat an oven to 450 degrees. In a medium size bowl combine the sugar and cinnamon, mix well so it is one even color. Sprinkle half (1/3 cup) of the cinnamon sugar mixture on a large cutting board or clean work surface. Gently spread out the sugar mixture to make a 13x15 rectangle. Unfold one sheet of the thawed puff pastry dough on top of the cinnamon sugar mixture on the cutting board or work surface. Melt the tablespoon butter in a microwave for 1 minute or in a small skillet on medium low heat. Lightly brush the dough with the melted butter. Pour the other half of the sugar mixture on top of the dough, spread so that it is evenly covered. With a rolling pin gently roll once or twice over the dough to press the cinnamon sugar on both sides of the dough. Gently roll out the dough to a 13x15 rectangle. Gently roll the dough’s left and right sides inward towards the middle. Both rolls will need to be about the same size in thickness. Be sure when you roll the dough towards the center that they are not too loose, to help keep most of the sugar mixture inside. After you roll the sides of the dough rolls, place one folded roll on top of the other creating one single roll, similar to closing an open book. Gently press in place and tighten the rolls if needed. Then gently turn the dough to a horizontal position leaving it on the cutting board or surface in front of you. With a sharp butter or chef knife, make ¾ - inch wide cuts until all the dough has been cut in ¾-inch wide pieces. You should have about 12-14 pieces of cut dough. Place each of the dough pieces on a baking sheet cut side faced up with space between them. Your rolled cut dough pieces will look somewhat heart-shaped. Bake for 12-14 minutes, flip the cookies halfway with a spatula so that the sugar can caramelize on both sides of the cookies. The cookies should have a nice golden light brown coloring on both sides, giving them a nice crunch. Careful the cookies and baking sheet are very hot when they first come out of the oven. Allow the cookies to cool, this will help them get even more crunchier as they cool on the baking sheet. Enjoy them with a cup of hot cocoa, tea, or coffee as they do in France, or serve as a dessert. They are delicious with a scoop of vanilla ice cream. ENJOY!!!
0 Comments
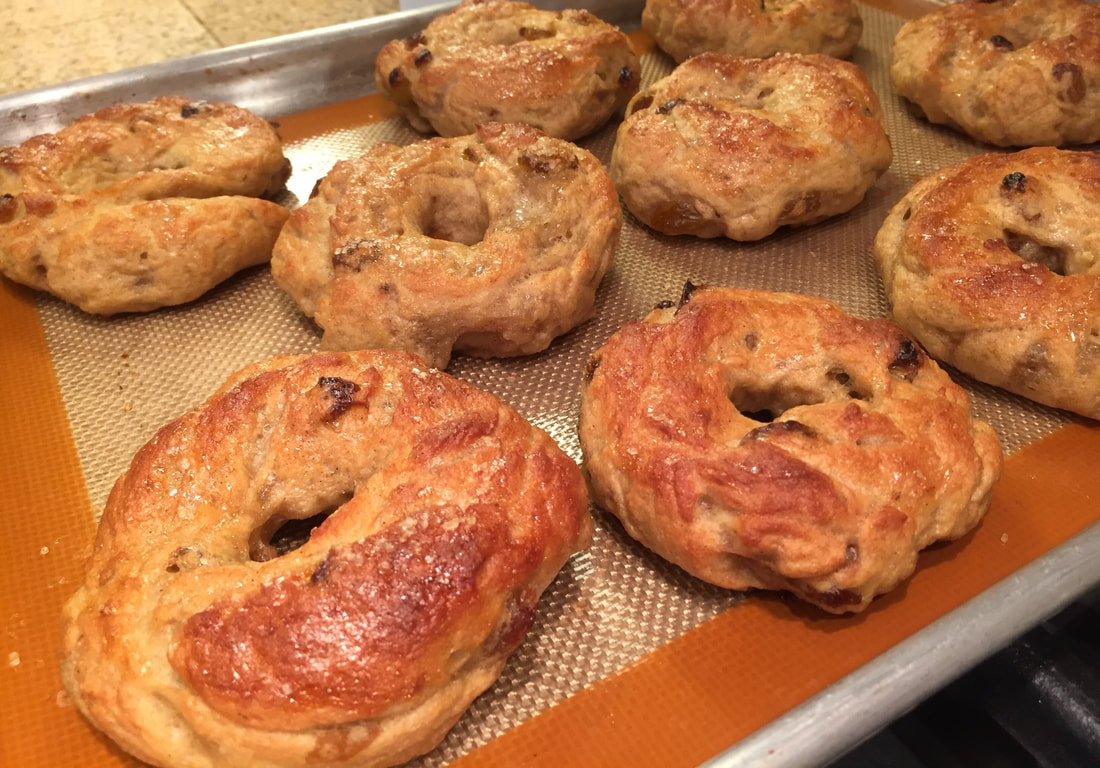
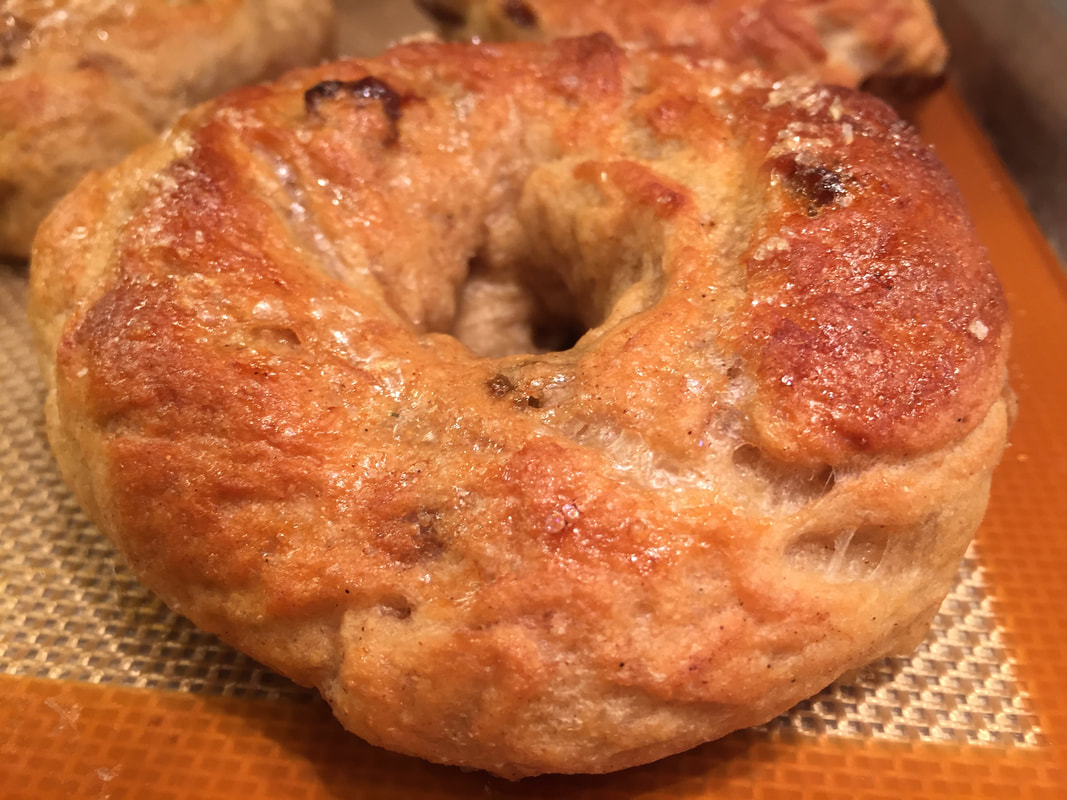
After all the continuous baking that's been going on in my household I was determined to find a healthier approach to enjoying bagels. I haven't eaten this many carbs since kingdom come..., and let's be honest I've developed a love hate relationship with carbs. I ask myself many times what happened to my will power? Personally I think sheltering in place has been a pretty good darn excuse for all the consumption, hah! It's a good thing that I had eager takers in my earlier fresh baked concoctions or I'd be in serious trouble. I'm getting close though so I'm ready for a healthier option.
In my search for a recipe that still had the same characteristics as Maria's traditional east coast bagels, a chewy interior and a crispy exterior I came across sallysbakingaddiction.com. In addition to searching for a healthier bagel recipe, I was desperately searching for a recipe that did not include diastatic barley malt for I've run out! The diastatic malt lends a slight sweet nutty flavor and additionally is a helpful rising agent in doughs. Now that you understand what I was up against, working and baking without this malt was a huge concern of mine. Also, I needed to be sure that any recipe I found could be easily converted to a whole wheat pastry flour. Whole wheat flour is the more common choice when baking healthier goodies, the difference is whole wheat pastry flour is a finer flour with less glutens. It does result in a fluffier less dense finished product perfectly suited for cakes, pastries, and cookies. Glutens are your friend when baking in general, giving a nice rise to your baked breads. Today whole wheat flour, and diastatic malt are also on the difficult finds list along with yeast and dark rye flour. With knowing that glutens are our friend when baking I came up with a combination of whole wheat pastry flour and bread flour blend to help encourage some rise in these delicious healthy bagels. I was also sure to boil the bagels 2 minutes on each side instead of the 1 minute that Sally suggest in her original recipe. I also choose to use a vanilla bean extract instead of the traditional vanilla extract that the recipe called for, thus adding a little more flavor. Mission accomplished! I was ecstatic with the results and found these bagels are delicious! However, I will let you be the judge. I would love and welcome any feedback or questions, please comment in the box beneath the recipe title or below the recipe. Give these bagels a try if you'd like a healthier version or just a break from the traditional bread flour bagel. Both versions are delicious! No need to break out the Kitchen Aid or hand mixer these bagels come together easily when hand kneaded. Enjoy!!! Homemade Whole Wheat Cinnamon Raisin Bagels Bagels without the guilt, less glutens without any flavor compromise. Yields about 8 medium bagels Ingredients: 1 1/2 cups warm water ( about 110 degrees Farenheit) 1 - 1/4 ounce active dry yeast package, if using rapid rise or instant yeast don't bloom*) 3 1/2 cup or (450g) stone ground whole wheat pastry flour, (I used Bob's Red Mill) 1 cup or (125g) bread flour, plus more for work surface and kneading, (I used Guisto's) 1 tablespoon dark brown sugar 2 teaspoons fine sea salt 1 teaspoon pure vanilla bean extract, vanilla extract is okay 3/4 cup golden raisins 3 tablespoons granulated sugar 1 teaspoon good ground cinnamon, (King Arthur's Vietnamese Cinnamon brand) 1 tablespoon vegetable oil, (to grease a clean bowl) 2 quarts water 1/4 cup honey (or barley malt syrup) 1 egg white beaten with 1 tablespoon water 1 tablespoon Turbinado sugar or sugar in the raw Preparation: Gently whisk the warm water, vanilla bean extract and yeast together in a small bowl. Cover and allow to sit for 5 minutes. For the best results measure out the flours in grams on a scale. Measuring each flour individually is key when baking, different flours have different weight densities per volume. Another tip to measuring flour is to NOT pack it down, flour should be measured after loosening with a spoon, then take a heaping cup measurement and level it off with an offset spatula. Add the two flours, brown sugar, and salt, in a large bowl and combine with a large serving fork or whisk. Add the yeast mixture to the flour and combine with a large fork, then hand knead until combined for about 2-3 minutes. The dough will look and feel somewhat wet. Fold the raisins into the dough by folding the dough over the raisins and gently kneading it with your knuckles pushing the raisins in the dough. Combine the sugar and cinnamon together and sprinkle onto a clean work surface. Place the dough on top. Gently knead and fold the dough over for 4 minutes, picking up all the cinnamon sugar. Work as much of the cinnamon sugar mixture as you can into the dough. The dough may become a little wet from the added sugar. Lightly grease a large clean bowl with oil or nonstick spray. Place the dough in the bowl, turning it to coat all sides in the oil. Cover the bowl with plastic wrap, or a clean kitchen towel. Allow the dough to rise at room temperature for 2 hours or until somewhat close to doubled in size. Placing the bowl inside an oven with the oven light on will help your dough rise. Line a large baking sheet with parchment paper or a silicone baking mat. When the dough is ready, gently pop any visible air bubbles. Divide the dough with a knife or bench scraper into 8 equal pieces. Shape each piece into a ball. Press your index finger through the center of each ball to make a hole about a 1-inch in diameter. Loosely cover the shaped bagels with kitchen towel and rest for a few minutes as you prepare the water bath. Preheat oven to 425°F Water bath: Fill a large, wide pot with 2 quarts of water. Whisk in the honey. Bring water to a boil, then reduce heat to medium-high. Drop bagels in, 3-4 at a time, making sure they have enough room to float around. Cook the bagels for 2 minute on each side. Remove the bagels with a slotted spoon gently draining them from any excess water, and place on a lined baking sheet. Egg wash: Using a pastry brush, brush the egg wash on top and around the sides of each bagel and sprinkle sparingly with Turbinado sugar. Place the bagels onto a parchment or silicone mat lined baking sheet. Bake for 20-25 minutes, rotating the pan halfway through. The bagels should be a dark golden brown. Remove from the oven. Allow the bagels to sit and somewhat cool on the baking sheet for 20 minutes. They will continue to bake while sitting after removing from the oven. Then transfer the bagels to a wire rack to cool completely. Cover leftover bagels tightly and store at room temperature for the first 24 hours, then keep in a refrigerator for up to 1 week, or slice in half and freeze for 30 days. Try some other exciting whole wheat flavored bagels such as cranberry orange bagels. Replace the golden raisins with cranberries and add 2 teaspoons orange zest to the dough. If you prefer to go without the added fruit try this bagel recipe plain, or top the bagels with your favorite toppings such as, sesame seeds, kosher salt, anise seeds, poppy seeds, pumpkin seeds, roasted garlic or onion. Combine all the toppings or in any combination for an everything bagel! Another fun great flavor for kids at home is to add chocolate chips instead of raisins in the same measurement. Be creative, involve the family to come up with your favorite family bagel flavor! *Rapid Rise or Instant yeast does not need blooming, meaning it does not need to sit in warm water to activate. Add rapid rise or instant yeast directly to dry dough mixture. Recipe is based on Sally's (the author) original recipe titled, "Homemade Cinnamon Raisin Bagels," posted October 27, 2015 on website, sallysbakingaddiction.com. Credit is given to Sally and her website sallysbakingaddiction.com. Hello all, I hope everyone is doing well and are staying healthy!
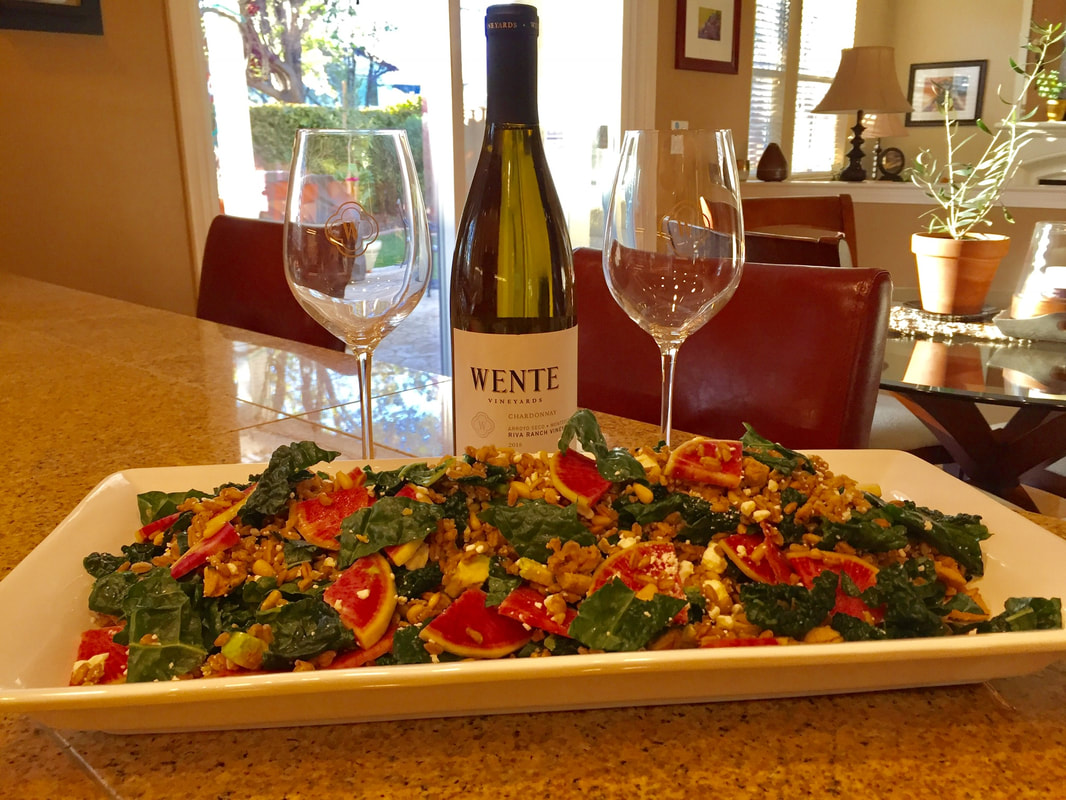
I'm assuming that most of you are still engaged in some version of cooking and preparing homemade meals. With extended orders for all of us to stay at home this is the perfect opportunity to explore in your own home kitchens. Whether you are baking or you prefer cooking I think it's fair to say that some of us may find these times somewhat challenging and are searching for different recipes to try out. So with that said, we'd like to share our delicious Shrimp Tacos with Mango Salsa recipe with you. This recipe does require a short marinating time, but we are confident it will be well worth the effort and that you will find that these tacos are packed with fresh vibrant authentic flavors. These shrimp tacos are delicious anytime of the week and are sure to fulfill your taco cravings. We encourage you to get creative with our recipes we are sharing if you don't like shrimp, use chicken instead. Also if you have difficulty finding mangoes use fresh pineapple instead. If mango or pineapple salsa aren't your cup of tea make or purchase a traditional Pico de Gallo, we recommend Caza Sanchez's salsas. If you'd like to add more heat to your tacos be sure to include some jalapeños seeds or increase the cayenne pepper measurement. The key is to taste as you cook to develop a personal touch to this dish that is perfectly suited for you and your family! If you have any questions please feel free to leave your message to us in the comment area beneath the title Delicious Street Tacos. We will try our best to get back to you with a response within a reasonable time. Stay Safe & Healthy Everyone! Spicy Chipotle Lime Shrimp Tacos with Mango Salsa This recipe is especially delicious on a hot summer night, and is perfect for any evening! Serves 4 Ingredients: 1 lb frozen uncooked shrimp or fresh shrimp deveined and washed 1 TB olive oil 1 TB honey 2 TB chipotle paste, or 1 ½ tsp good ground ancho chile powder (very mild) ½-1 fresh Jalapeno, deveined and seeded, finely chopped, set a teaspoon aside 1 garlic clove, finely minced 1 tsp toasted ground cumin, (toasting optional) ½ tsp or less cayenne pepper 1 TB fresh lime juice, from ½ a lime, use other half for lime wedges 1 tsp lime zest Mango Salsa Garnish Ingredients: 2 radishes, sliced in half moons or julienned (medium) 2 cups green cabbage, finely sliced or shredded 1-1½ inches bite size pieces 1 cup small diced fresh mango (small) ¼ cup cilantro, finely chopped 1 teaspoon minced jalapeno pepper 2 tablespoons white wine vinegar 1 ripe firm avocado, sliced (optional) Mexican sour cream known as Crema Mexicana, (optional) Serve with 1-package corn tortillas, or 8 fresh prepared corn tortillas. Preparation: Marinade the shrimp in olive oil, lime zest and juice, chipotle paste, toasted ground cumin, and honey for 15-20 minutes. Dice, chop and slice the cabbage, radishes, mango, and cilantro and combine in a bowl and set aside. If you'd like to add an avocado to your taco, with a knife slice it in the middle lengthwise. Twist after slicing the avocado to separate into two halves. Remove the avocado of its pit and remove from the outer peel. Place cut side down on a cutting board and cut each half lengthwise in thin 1/4" slices. In a medium skillet over medium high heat, add a tablespoon of olive oil. Add the garlic and jalapeno. Cook until soft, 1-2 minutes. Add the shrimp drained from marinade and cook 4 minutes or until it changes to a pinkish color. Remove from heat and allow the shrimp to sit undisturbed for about 1 minute. Place a generous spoonful of the warm shrimp mixture on a tortilla, top with fresh chopped salsa ingredients, add an avocado slice, and a drizzle Crema Mexicana on top if desired. Serve with a lime wedge. (refer to photo on 4/14/20 guacamole post) After my bagel experiment I was determined to acquire yeast for baking. And boy did I acquire it! We found a restaurant in town that was selling 1 pound bags of SAF instant yeast so we bought one. Needless to say, I'll be doing a bit of baking over the next few weeks. It seems that the instant yeast is easier to find that the packets of active dry yeast. If a recipe calls active dry yeast, I sub out the same amount of the instant yeast. The difference is that you don't need to bloom the instant yeast first, meaning that you don't need to add warm water or liquid to the yeast to activate it, you can just add it to the flour. As with the bagels that I made a few weeks ago, I am feeling the need to make comforting foods that I grew up with. That brought me to my next experiment which was the Italian Sesame Seed bread. This was a staple in our house growing up. We would pick it up at bakeries in New York or the local chain grocery store near us in Connecticut which had an excellent rendition of this tasty loaf. Alas, I haven't found a good substitute out here. The sourdough in the bay area almost makes up for the void left by this loaf but I'll save that for another week... I was very happy to find out that this loaf is not only delicious, but one of the easiest yeast breads that I have ever made. Here's the recipe that I used: Italian Semolina Bread with Sesame Seeds* Yield: 1 braided 1 1/2 lb. loaf Ingredients: 1 cup semolina flour, plus more for dusting 1 cup bread or 00 flour 1 cup all-purpose flour 1 1/2 teaspoons kosher salt 1/2 teaspoon instant yeast 1 1/3 cups lukewarm water, about 80-85 degrees Fahrenheit 2 tablespoons lightly beaten egg white 3 tablespoons raw Sesame seeds Procedure: In the bowl of a standing mixer fitted with the dough hook, combine the semolina flour, the bread or 00 flour, the all-purpose flour, salt and yeast. Turn on the mixer to lowest speed for 20-30 seconds to combine. Add the water and turn the mixer on again and mixer until the dough starts to come together, about 1-2 minutes. The dough will be something of a shaggy mass at this point but as long as all the flour is incorporated, that’s fine. Cover the bowl with plastic wrap and leave to rise on the counter overnight, at least 10 hours and up to 20 hours. The dough should double in bulk and have tiny bubbles on top at this point. Sprinkle your work surface with about ¼ cup of semolina flour. Gently pull the dough from the bowl and knead just until you form a somewhat smooth ball of dough. This should only take a minute or two. Divide the dough into 3 equal pieces with a pastry cutter or knife. Roll each piece of dough into a 12” rope and lay them next to each other. Braid the ropes together starting in the middle; take the rope on the right side and cross it over the middle rope so that it now is in the middle. Take the rope of dough on the left and cross it over the middle rope. Repeat to the end and then pinch the dough together and fold under the loaf. Repeat on the other side. Cover the loaf when done and let rise for an hour until risen about 50%. While the dough is rising, move a rack to the middle of the oven and preheat your oven to 425 degrees Fahrenheit. If you have a pizza stone, place it on the rack in the oven to heat up. If you don’t have a stone, place a cast iron pan with high sides or a large ceramic baking vessel or a dutch oven that can withstand the high heat in the preheating oven to heat up. When the bread has risen, brush the top and sides with egg white and sprinkle evenly with the sesame seeds. Gently move the bread to the pizza stone or the baking vessel that you’re using being careful not to burn yourself. If using a pizza stone, cover the bread with an inverted pot that can withstand the heat. If using another baking vessel, cover with a top that does not touch the bread. Bake for 30 minutes. Remove the lid or whatever is covering your bread and bake for another 15 minutes until golden. Remove from the oven and move loaf from the stone or pan to a rack. Let cool for about 10-15 minutes. Find some butter or good olive oil and have at it. *Inspired by: Editors, LC. “No-Knead Italian Bread.” Leite's Culinaria, 29 Feb. 2020, leitesculinaria.com/110773/recipes-no-knead-italian-bread.html. 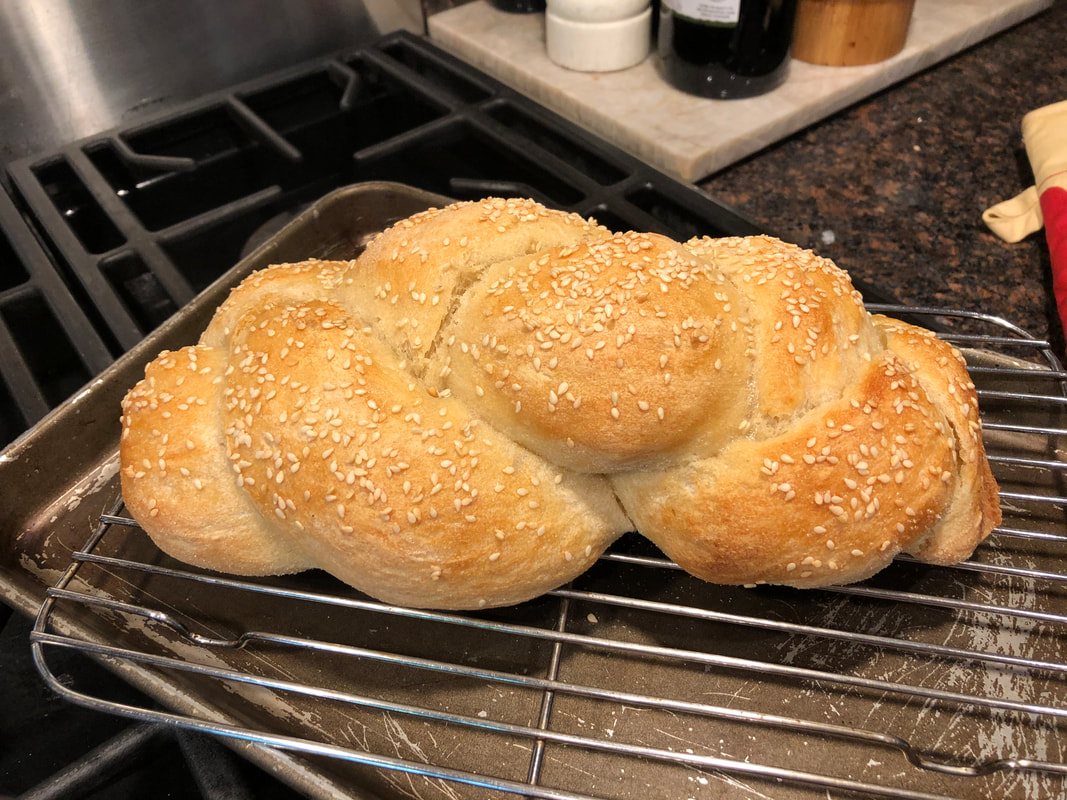 We love Taco Tuesdays! The sunshine in California is blazing today making it a great day for a shelter in place Mexican al fresco dinner! Can't believe we're expected to hit close to 80 degrees sometime today. Enjoy your tacos with chicken, shrimp, pork, fish, steak or (vegetarian) with black beans. Either way they won't disappoint! Tacos are also delicious with an appetizer or side accompaniment such as our Zesty Lime Fire Roasted Jalapeño Guacamole! Our guacamole is packed with delicious traditional flavor and is quick and easy to make. Consider serving your meal with thirst quenching margaritas and or Mexican beer! Some of our favorite Mexican beer brands are (Dos Equis, Pacifico, Carta Blanca, Negro Modelo, or Bohemia). They are refreshing anytime of the week and always a nice compliment to any Mexican meal! If your prefer not to prepare homemade tacos consider ordering them from your favorite Mexican restaurant or taqueria. Small businesses are struggling to survive and currently need our support during the current unusual world and nationwide economic and health circumstance we are faced with today. But please don't forget to give our popular delicious guacamole a try this evening with tortilla chips and or tacos. It won't disappoint and is sure to place a smile on all of your family members faces. Salute! Zesty Lime Fire Roasted Jalapeno Guacamole & Chips A Jalisco-style simple yet flavorful guacamole, excellent when accompanied with a bartender’s margarita! In this recipe Jalapeno is added for flavoring rather than heat. Serves 4 Ingredients: 2 large Hass avocados 2 tablespoons freshly squeezed lime juice, taste for preference ¼ cup finely chopped white onion ½-1 clove garlic, minced (optional) 1 cup or 12 medium cherry tomatoes, quartered 1 jalapeno, deveined and seeded and finely minced, (optional) If heat is preferred include some jalapeno seeds ¼ cup coarsely chopped cilantro ½ tsp kosher salt (taste for preference) 1 bag Senor Sanchez Tortilla Chips, or 8 fresh corn tortillas, cut into 6 triangles, fried in oil and salted Preparation: Over an open gas range flame with kitchen tongs roast or blister the jalapeno until lightly charred on all sides. This is an optional step. However, we recommend it to help add a smoky flavor to the guacamole. Set aside to cool, remove the white veins and seeds from the jalapeno and mince. This is an optional step. Mince the onions, peel and smash the garlic clove, and coarsely chop the cilantro. Rub the peeled smashed garlic clove on the inside of the guacamole serving bowl and discard afterwards. Peel and slice the avocados and remove the center pit and mash with a fork in a small bowl. Add all the chopped ingredients to the serving bowl and gently combine. Squeeze and add fresh lime juice, and taste for your preference. Season the guacamole mixture generously with kosher salt and taste. Serve the guacamole with fresh homemade tortillas or Casa Sanchez's thick or thin tortilla chips. Can't believe we're already in the week of Easter with our sheltering in place. Be careful shopping for your ingredients this week as it will be busy at the essential markets with everyone out there trying to prepare for the holiday! Don't forget to include your distant family members in your Passover or Easter celebration through Zoom, FaceTime, or Facebook live. CDC now has asked that we as a nation wear face masks while in public places; gloves are also a great idea when grocery shopping. Be safe everyone, and protect your families and yourself. A week or so back I decided to make this one-dish meal and it was delicious, fresh, and healthy. If you'd like to use it as a side dish for Easter or any meal, simply remove the added chicken and add another vegetable or two if you'd like. I think rainbow carrots would be a nice addition after they've been peeled, chopped and lightly roasted in an oven! Kale Farro Chicken Superfood Salad This one dish meal pairs nicely with Wente Vineyard 2018 Riva Ranch Chardonnay. If you’d like to use this recipe as a side dish simply remove the chopped chicken. Serves 4 Chicken & Salad Ingredients: 4 boneless chicken thighs 1-1/2 tablespoons good extra virgin olive oil 1 garlic clove, minced 1/2 teaspoon smoked paprika 1/2 teaspoon cumin 1/2 teaspoon lime zest Juice from one lime season with salt and pepper 2 cups farro (we use Trader Joe's 10 minute farro) 3 1/2 cups chicken broth, vegetable broth or water 1 bushel Lacinato Kale, stripped of core and chopped in 1 inch pieces 1 fresh chopped fruit such as a Fuji apple or Bosc Pear, cored and diced medium (optional) 1 watermelon radish, or 4-6 large Easter radishes, sliced in half moons or quarter moons if large 1- 1/2 tablespoons fresh parsley, chopped, saving a little for garnish 1/4 cup toasted pine nuts or pistachios Vinaigrette Ingredients: 1 small shallot, finely diced 1/2 teaspoon dijon mustard 2 teaspoons red wine vinegar 2 tablespoons good extra virgin olive oil, divided 2 tablespoons fresh lemon juice 1/2 teaspoon kosher salt 1/4 teaspoon fresh cracked pepper 1/4-1/2 cup feta cheese, garnish Preprarations: In a medium bowl add olive oil, paprika, cumin, garlic, lime zest, salt and pepper. Whisk to combine the mixture and add chicken thighs and cover allowing chicken to marinate at least 30 minutes. In a skillet on medium high cook chicken about 6-8 minutes on each side. Larger pieces will need to cook longer and should have an internal temperature of 165 degrees. Once chicken is done set it aside to cool. Chop chicken in 1/4 inch pieces once it has cooled. Prepare Farro as instructions indicate on packaging. Set aside to cool. Chop the kale, apple or pear, radishes, parsley. Place the kale in a bowl with 1 tablespoon olive oil. Combine well to help soften the kale and breakdown cellulose fibers. Using your hands to coat and massage kale for a few minutes works well. Add remaining chopped ingredients and combine well with kale. Add pine nuts, chicken and farro, lightly season with salt and pepper and combine. In a small bowl or mason jar with a lid combine shallots, remaining tablespoon olive oil, red wine vinegar, lemon juice, dijon mustard, salt and pepper. Whisk ingredients to combine or shake if in a mason jar. Add to Kale mixture and combine. Place ingredients on a serving platter or bowl and garnish with leftover parsley and feta cheese. Serve immediately. Here we are, 2 weeks into the Shelter in Place that we're under to help slow the spread of the Coronavirus. I have 1 pacakge of yeast left. Today is the day I will use it. I have looked for more yeast packets at both Whole Foods and Lucky and haven't had any luck finding them. So yeast is currently at the top of my shopping list. For the final packet of yeast, I'm trying (again) to make good, New York style bagels. I grew up eating the best bagels in the world which was delicious but set me up for future disappointment. I have friends that buy their bagels at the grocery store and believe that this is what bagels are supposed to taste like. I disagree. Wholeheartedly. Whenever I visit home (Connecticut) I stop on my way to Connecticut from the airport in New York at a place called Utopia bagels in Whitestone, Queens. These are the stuff bagel dreams are made of. (Yes, I dream of bagels - and other foods.) I pick up a dozen which I will consume with my family over the course of our stay in the northeast. If we run out, there is a great bagel shop in Ridgefield, Connecticut which is where we lived when our kids were born. It's called Steve's bagels. They also have a fabulous coffee cake and other baked goods. Living in California, I have come across some almost acceptable substitutions but nothing has been consistently good. I have ordered from New York Bagels which are consistently decent but not dreamy. So I am left with my packet of yeast and a dream. I have researched what makes New York bagels so good and I'm going to try and replicate them here. Here are a few pictures of my bagel adventure with the recipe following. I have to say that it was well worth the effort. The bagels were chewy on the inside and still had the slightly crusty exterior. They may not measure up to my dream bagels but they cured the craving. And they are cheaper than buying a plane ticket. Enjoy. Homemade Bagels*
Yield: 16 bagels Ingredients: Dough: 1 packet (2 1/4 teaspoons) active dry yeast or instant yeast 2 cups (454g) lukewarm water, about 100 degrees Fahrenheit 1/4 cup (35g) diastatic malt powder 2 tablespoons (25g) sugar 1 tablespoon (14g) salt 5 3/4 cups (820g) bread flour or 00 flour Water: 2 tablespoon diastatic malt powder 1 tablespoon sugar Optional Toppings: 1 egg white Everything Bagel Topping Sesame Seeds Poppy Seeds Course Sea Salt Procedure: To make the dough: In a large bowl, mix all of the ingredients, then knead until smooth, using your hands or a standing mixer fitted with the dough hook. I ended up kneading the dough by hand for 10 minutes since my standing mixer tends to overheat with that much dough in it. Shape the dough into a ball, place it in a lightly greased bowl rolling the dough ball around so that the oil covers the ball. Cover the bowl plastic wrap, and allow it to rise in a warm spot until doubled in bulk, 1 to 2 hours. A good place to let the dough rise is in the oven with the light turned on or on the stove top with the stove light turned on. After the dough has risen, gently deflate the dough, and transfer it to a clean work surface. Preheat the oven to 425°F. For the water bath: Put water into a large pot; it should be about 3" deep. Add the malt and sugar. Bring the water to a boil while you're shaping the bagels. Divide the dough into 16 pieces. Do this by shaping the dough into a square and then cutting in ½. Cut each ½ into ½ again and keep going with the halves until you have 16 pieces. They won’t be all exactly the same size but that’s what makes them look homemade! Working with one piece of dough at a time, shape it into a ball. Roll the ball on the work surface with your hand until the ball is pretty round. Poke a hole through the center with your index finger, and twirl; the dough will form a ring. Place the bagels on a parchment-lined baking sheet as they're shaped. (You can refrigerate the dough at this point covered with plastic wrap if you want to finish cooking them later.) Once all the bagels are shaped, reduce the boiling water bath slightly. Starting with the first bagels you shaped, gently transfer 3 or 4 at a time to the water bath being sure not to crowd them. Simmer them for about 60-90 seconds on each side then return them to the baking sheet. If you like them chewy like I do, you can leave them in as long as 2 minutes per side. If using toppings, you will add them now. First make an egg wash with the egg white and a tablespoon of water. Brush boiled bagels with egg wash and sprinkle with desired toppings. Bake the bagels for 18 minutes, or until they're a deep golden brown. Remove them from the oven, and cool them on the sheet pans. Serve bagels warm or at room temperature. Store at room temperature, well wrapped, for 1 day. To store longer, cut the bagels in ½ and place in a freezer safe plastic bag. Bagels will keep in freezer for up to 3 weeks. *Based on the Water Bagel recipe by King Arthur Flour Homemade Granola
Yields about 6 cups Ingredients: 3 cups rolled oats 1 cup slivered almonds ¾ cup shredded sweetened coconut 1/3 cup dark brown sugar ¼ cup maple syrup ¼ cup canola oil ½ teaspoon salt 1 cup dried fruit such as raisins, cranberries, cherries or sliced apricots Procedure: Preheat oven to 250 F. In large bowl, combine the oats, nuts, coconut and brown sugar. In another bowl, combine maple syrup, oil and salt. Add to oat mixture and stir until well combined. Transfer to two baking sheets in a single layer and bake for 1 hour and 15 minutes. Stir mixture every 20 minutes or so to achieve even browning. Remove from oven and cool slightly. Add dried fruit and enjoy. |
Hi there! Welcome to the Home Epicurean Blog. We're sharing some recipes and ideas from our classes here. Please let us know what you think!Archives
May 2020
Categories |


 RSS Feed
